knitted letter charts / alphabet


A   to Z

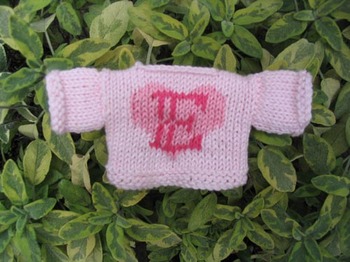
E_jumper_1

I designed these charts for a college typography project longer ago than I care to mention! In the past I have used the letters on jumpers for some of the toys but as I'm no longer able to take on orders I thought I'd share them. You can group them to spell out words or use them singly on projects where you want an initial.

The original charts that I designed are here: https://littlecottonrabbits.typepad.co.uk/photos/alphabet/

or

You can download an updated pdf file of the charts here: Download Alphabet

Copyright © Julie Williams 2006.


knitted holly

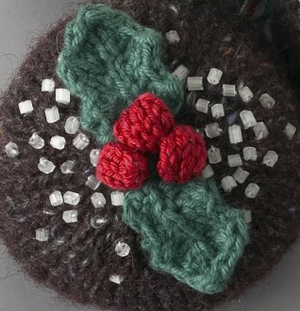
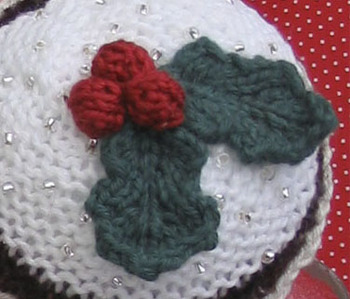
This is a bit fiddly but worth the effort and if you can interpret my instructions I'm sure you'll be pleased with the way that you get a distinct vein up the centre of the leaf.

Hopefully I've explained it well enough to follow - if you have any suggestions on a better description of the twisted stitch please drop me a line.

Many thanks!
 

Holly2_2


Holly:

Using 2.25mm needles and 4ply yarn cast on 3 stitches
Row 1: Purl
Row 2: K1, YFON, K1, YFON, K1 (5 stitches)
Row 3: P1, twist a*, YFON, P1, YFON, P2 (7 stitches)
Row 4: K2, twist b**, YFON, K1, YFON, K into back of next stitch, K2 (9 stitches)
Row 5: P3, twist a*, P5 (9 stitches)
Row 6: K2tog through the back, K5, K2tog (7 stitches)
Row 7: P2tog, p3, P2together through the back (5 stitches)
Row 8: K2, YFON, K1, YFON, K2 (7 stitches)
Row 9: P2, twist a*, YFON, P1, YFON, P3 (9 stitches)
Row 10: K3, twist b**, K1, K into back of next stitch, K3 (9 stitches)
Row 11: P2tog, P5, P2together through the back (7 stitches)
Row 12: K2tog through the back, K3, K2 tog (5 stitches)
Row 13: P2tog, P1, P2tog through the back (3 stitches)
Row 14: K1, K2 together pass first stitch over, pull end through  to cast off

Abbreviations:
YFON = Yarn forward over needle - makes an extra stitch. Start with the working yarn at the back of the work, bring it over the right hand needle to the front and back under the right hand needle again to the back so making a loop.

* twist a = insert right hand needle into the back of the made stitch purlwise, slip onto the righthand needle and slip back onto the lefthand needle so that what was the back of stitch becomes the front. Purl into back of this stitch)

** twist b = insert right hand needle into the front of the made stitch knitwise, slip onto the righthand needle and slip back onto the lefthand needle so the back of stitch becomes the front. Knit this stitch )
 

Holly

To make the berries:
Using 2.25mm needles and red 4ply yarn, Cast on 3

Row 1: P3
Row 2: K1, YFON, K1, YFON, K1 (5 stitches)
Row 3: P5
Row 4: K5
Row 5:P5
Row 6: K2tog through the back, K1, K2tog (3 stitches)
Row 7: Slip 1, P2 tog through the back pass slip stitch over, thread end through to cast off
Tie both cast on and cast off ends together and use one end to sew base together and make a small ball

Making up
Sew 2 leaves together at a slight angle, position desired number of berries in centre and sew in place.

Copyright © Julie Williams 2006.


knitted cupcake decoration


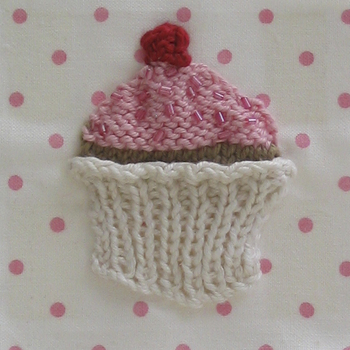
Cupcake

 
Materials:
a few oddments of yarn in cream, chocolate, pink and red
I use 4ply cotton yarn with 2.25mm needles (size 1 US, UK/Canada 13)
seed beads / sequins / decorations

Pattern:

Cast on 15 stitches with the cream colour for the cake case
Row 1:   (K1, P1) 7 times, K1
Row 2:   (P1, K1,) 7 times, P1
Row 3:   as row 1
Row 4:   as row 2
Row 5:   as row 1
Row 6:   as row 2
Row 7:   as row 1
Row 8:   as row 2
Row 9:   K1, (P1, wrap yarn once around needle* K1) 7 times      * to make a stitch
Row 10: (P1, Knit into the front of made stitch, K1) 7 times, P1
Row 11: (K1, P2) 7 times, K1
Row 12: cast off, keeping ribbing correct

Row 13: With chocolate cake coloured yarn pick up and knit 15 stitches from the back of the finished case (around 1 row down from the cast off edge) taking 1 alternately from the purl rib and 1 from the knit rib.
Row 14: purl a further row in cake colour
Row 15: change yarn to pink colour for the icing and knit 1 row
Row 16: knit a row
Row 17: purl a row
Row 18: knit a row
Row 19: P2tog, P 11, P2tog through the back
Row 20: K2tog through the back, K9, K2tog
Row 21: P2tog, P 7, P2tog through the back
Row 22: K2tog through the back, K5, K2tog
Row 23: P2tog, P 3, P2tog through the back
Row 24: cast off remaining stitches

Cherry on the top:
Cast on 4 in red yarn
knit 1 row
(P2tog) twice, pass 1st stitch over the second and pull end through to secure.

alternatively you could use a fabric flower instead of the cherry or cut a small circle of red felt.

To Finish:
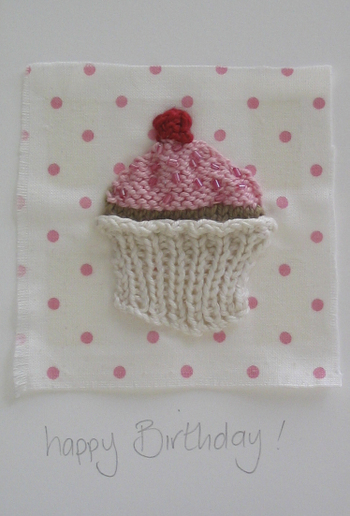
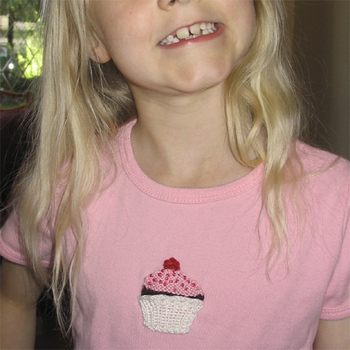
Sew cherry on to top. Sew in ends neatly on reverse. Sew on beads / sequins and attach to T-shirt / tea cosy / greeting card etc...

Tshirtcupcake_2


Cupcake_card

Copyright © Julie Williams 2006.


knitted flower pattern

Flower

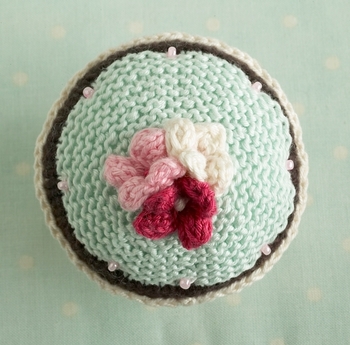
Can be used singley as a decoration on clothing and accessories or grouped to make a posy and sewn onto a hairband or hairslide. Knitting it in green will give you a shamrock / lucky clover. I’m sure there are lots of other uses too.

Materials: Using 2.25mm (USA size 1, UK/Canadian size 13) needles and 4 ply yarn

Pattern:

cast on 5 stitches
row 1: **slip 1, knit 3. turn leaving remaining stitch unworked
row 2: purl 3, turn leaving remaining stitch unworked
row 3: knit 3, turn leaving remaining stitch unworked
row 4: purl 3, turn leaving remaining stitch unworked
row 5: knit 4
row 6: purl 2 together, purl 1, purl 2 together (3 stitches)
row 7: knit 1, knit 2 together and pass first stitch over to give 1 stitch on needle
Use this stitch to cast on 4 more stitches (5 in total) and repeat from ** to give desired number of petals (3, 4 or 5)

If you'd like a larger flower then simply cast on 7 stitches and follow the same principle of working only on the centre 5 stitches for the first 6 rows and then decreasing by knitting 2 stitches together at both ends of the following rows until you have a single stitch again. Repeat for the desired number of petals.

To finish:
thread end through last remaining stitch and then gather up the middle of the flower by catching up  2 stitches the from base of each ‘petal’, pulling up tight and tying off the ends.

Attach to article and sew a contrasting french knot / button / felt circle in the centre of flower.

Working on the middle stitches only gives the ‘petal’ a natural curl. Once the flower is finished you can choose to curl petals up or down.


405654460_1923583f17_o

Copyright © Julie Williams 2006.